The following real estate photo tips will help you to get started as a professional photographer. But even if you are not looking to make this a career move, these tips would help you nevertheless to get cleaner, more professional looking images, in case you are looking to list your home for sale. All you need is a camera that allows you to control your exposures manually and a photo editing software like Photoshop or Lightroom.

House Exterior – Real Estate by BrianDooley.com
There are two ways to approach a real estate photography. You can either start with the absolute basic and then spend hours processing each image in Photoshop or get much of the image right in-camera and later just blend everything together and do light retouching to ready the finished product. The later requiring you to depend more on tools to get a usable photo straight out of camera.
Real estate photography requires many of the same techniques you would normally use when photographing architecture. And just to clear the air, you don’t need anything more than you would need to set-up a small studio.
Basic Approach
We will shall talk about the tools for real estate photography later. But first we shall concentrate on the basic approach. The basic approach for any real estate photography is to ensure that there are lots of light to expose the inside of the property. So, turn on the lights inside the room and ensure that every nook and corner is properly illuminated. Set up your flash / strobe to compensate for any color temperature from the lights in the room.
Pull away the curtains to ensure there is some light coming through the window. Hopefully the lights is not too harsh. If the light is too harsh pull down the blinds and then gently open them up a bit to diffuse the light and make it softer.
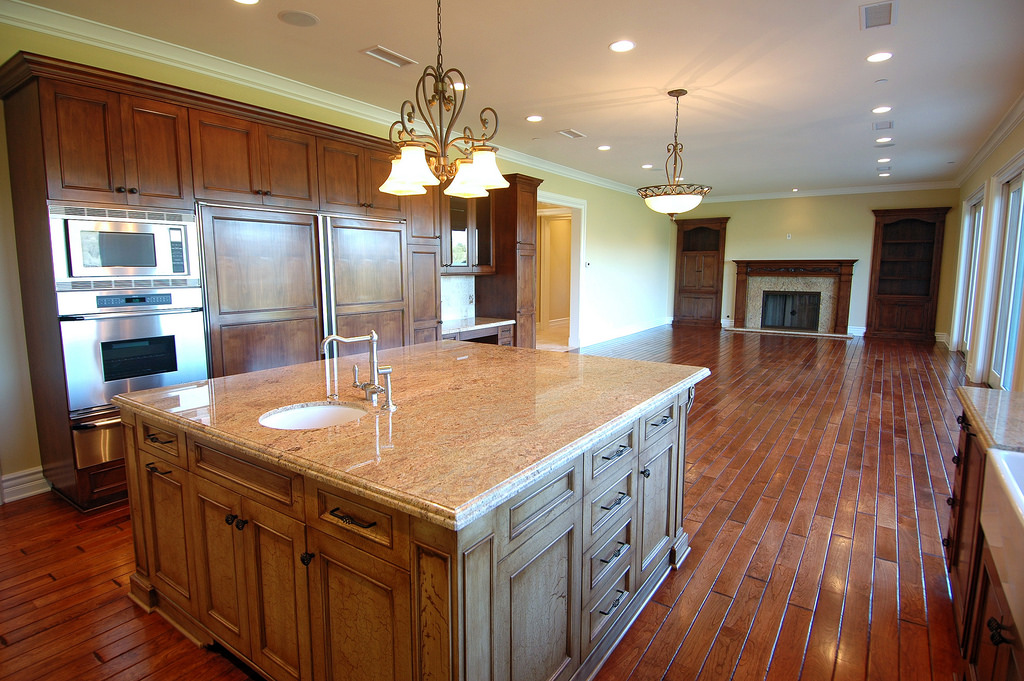
For every room that you photograph, ensure that you have an image from all four corners to cover the entire four-corner perspective. This would allow you to choose the best one when you finally sit down to process them.
Composition is critical to any type of photography and the basic elements of composition apply to real estate photography as well. An important thing to note in your composition is that nothing should be out of place in the image. If the furniture are not in place and your experience tells you that they can be better arranged, take permission and do that. Your clients will love you for the photos.
Camera Settings
Let’s start with the ISO as this is something that is often overlooked. The last thing that you would want is noise in your images. Noise can pose a problem when you want to have a clean pin-sharp photo of the interior of a house. Noise reduction uses some degree of image blurring and that creates softness, something that is unacceptable for real estate photos. So set your camera to the lowest ISO setting possible on your camera.
Aperture should be set to something like f/11 or smaller. This depends on a few things. First is the size of the room you are photographing. If the room is too big, even f/11 would be insufficient.
Shutter speed is the final element of the exposure triangle. Since you are using a tripod there should be no worries using a slow shutter speed. Remember, shutter speed controls the amount of ambient light that you are going to capture. You don’t need it to be any slower than necessary. Slow shutter speed can also contribute to noise as the sensor captures light over a longer time frame. Instead of a single slow shutter exposure you can make several exposures and then blend them together.

Real Estate by Aurimas
Auto Exposure Bracketing
Even with all the careful adjustments and settings a single exposure might not be enough to do justice to an interior. The windows may be too bright. There may be pockets of dark areas that simply refuse to comply. The solution in such situations is to either do a large amount of post-processing, bringing the shadows up or use what is known as exposure blending or, in some advanced shooting requirements an extensive amount of both to ensure that you have a print quality photo.
Exposure blending, truly speaking, is a post-processing technique that blends two or more images not necessarily of the same scene, into one single image.
HDR
HDR as a technique is no longer a novelty. Far too many photographers are doing it these days and some with really horrifying results. The technique involves using multiple exposures of the same scene each one with a different exposure setting and then blending together all of the exposures into one image. This sounds like something that we have already discussed in the paragraph on exposure blending. But the difference in this technique is that all of the exposures are of the same scene. They are identical in terms of composition. The only difference being the exposure value.
HDR as the name suggests is a technique that is aimed at creating images with a far greater dynamic range than is possible in a single exposure. It is like mimicking the capabilities of the human eye in an artificial way. Don’t go overboard with the HDR technique as you can easily ruin your photos.
Light Painting
Light painting is yet another technique that you can use in real estate photography. This is probably one of the best kept real estate photo tips you will ever stumble upon. It usually involves a hand-held light source and then using it to paint the subject while the exposures are being made. Essentially, in real estate photography you would use a faster light source. Something like a speedlight. Set it on slave mode and it would fire the instance the camera fires. You would physically move around the scene painting it with the speedlight as the camera fires the shots remotely. Light painting is the only way to convincingly make the exteriors of a real estate photo go from OK to wow.
White Balance
Sure you can change white balance later during post-processing and you may have the inclination to shoot in RAW and auto white balance. But, you are advised not to. Auto white balance can sometimes get it horribly wrong and that means a lot of work correcting it in post. Set your white balance to the most dominating light in the frame. In case you are using flash / strobes, set your white balance to the color temperature of your flash output.
Treviso – Sherwood Real Estate by Sherwood CC
Tools – Camera
Full frame cameras are the order of the day. Though, in some cases even an APS-C camera will do. Full-frame cameras capture a much wider slice of the scene. This is what you would ideally want when working in a tight position and really cannot backup any more. However, in defense of APS-C cameras it must be said that they tend to produce a greater depth of field compared to full-frame systems for the same lens and camera settings.
Lens
The lens you want don’t have be a fast wide prime. You would never be using it at a wide aperture anyways. What you need is a super large depth of field and that can only be produced using a small aperture. Neither does it have to have the ability to zoom. If the lens gives you a 35mm format equivalent angle of view as a 16mm (or wider) lens you are fine.
What you need to have other than a wide angle of view is that the lens must be super sharp. Only a super sharp lens will produce images that are appealing and worthy of being used as real estate adverts. The Nikon 16-35mm f/2.8 lens is a good choice.
Tripod
Tripod is a must have for real estate photography. This list of real estate photo tips would be incomplete if I don’t stress on the use of a tripod. A tripod is essential because A – you need to be able to shoot with some sort of stability and B – you might need to blend a few exposures together and for that it is imperative that the exposures are perfectly aligned.
The tripod that you choose should allow you to adjust the shooting angle. In case you wish to shoot from a height higher than your eye level, the tripod should go high enough to allow you to do that.

Real estate Twilight by DigitalRealism
Remote Trigger
Comes in handy in situations when you need to shoot with absolutely no wobble added to the image. Other than a remote trigger if you could connect your camera to your smartphone and fire remotely that will do just fine.
Transceivers
Transceivers are radio triggers for your flash. Two of these make a pair wirelessly connecting the camera with the strobe / flash. These are really convenient to shoot with. Some of the techniques that we discussed above, such as light painting requires that you use a transceiver. That way you can remote trigger the camera from a distance and aim the flash at an object at the same time.
Light
You will need one light. At least one would be a bare minimum. This would ensure that you are able to light those pockets of dark areas in the scene that are interspersed with the properly lit areas. With a flash powering down on the scene you will also be able to use a faster shutter speed and cut down on the ambient light coming through the windows or produced by the other lighting sources. For using a faster shutter speed you will need a strobe / flash that allows high-speed sync.
Post-processing
Post processing real estate photos is a subject in itself. I will not be delving too much into it here as I plan to do a separate real estate photo tips dedicated to the basics of post-processing real estate photos. However, I will touch a couple of points.

Sherwood Real Estate by Sherwood CC
Always shoot in RAW. That goes without saying. When importing multiple exposures for blending them in to Photoshop import them as layers for a single image.
Select at least three exposures when blending your images. This goes for real estate exterior photos. For insides a minimum of two exposures are necessary. Select one exposure that exposure the sky properly. One which exposes the exterior walls of the property properly and finally one that exposes for the vegetation, the sidewalk and those sort of areas which are usually the darkest.
With wide angle lenses you will get a bit of barrel distortion. Check for the ceilings, the cupboards and any straight lines there may be in the frame and whether they appear to be converging. If they are converging then there is some barrel distortion. This will be more towards the fringes of the frame. Ensure that you correct any such barrel distortion in your photos.
There is a lot that you need to pay attention to. The entire shoot has to be pre-planned right down to the number of RAW frames you need, keeping in mind your post-processing routine. Let’s say that you have a restaurant to photograph. For each table set-up you will need a separate frame (without changing the composition). Each time a handheld flash is fired to mimic the overhanging light source.
The best thing about real estate photography is that it is a unique and hard genre and not many people are doing it. If you really put your heart and soul into it there is a good market for this type of work.

Rajib Mukherjee
Latest posts by Rajib Mukherjee (see all)
- How to Pick the Best Shooting Mode among Auto, S, A, Manual in any Situation - July 20, 2017
- Camera Settings Presets for Shooting Different Scenes - July 11, 2017
- What to Discuss with Client Before the Photo Shooting - July 6, 2017