I love shooting with backlighting. Backlighting is one of those acquired tastes in photography that can give your work a completely new dimension. Reason? Because not too many photographers know how to use it, and certainly, not too many people know how to set it up correctly.
Backlighting
To begin using backlighting in your photography you first need to have a clear understanding of what backlighting is. Backlighting refers to placement of lights towards the back of the subject being photographed. You don’t have to push it as far as 90 ˚ directly behind the subject. Just an acute angle of 60 ˚ or so behind the subject will get you the result that you are after.

Contraluz / Backlighting by Gabriel González
The end objective of backlighting is to separate the subject from the background. Thus, when light is coming from the back of the subject the edges are illuminated and the subject is highlighted against the background, it is an example of backlighting.
You would think this would result in the subject’s face getting underexposed. Not really. Once you get a hang of the placement of the lights and adjustment of the power, you can mix it up with reflectors and natural light to bring up the exposure on the subject’s face.
But having said that, backlighting sometimes lead to a slightly contrasty lighting result. Again, at other times when no fill light is used the lighting results in a flatter, less contrasty image.

by PHOTO VANOVA
It thus, can be both a moody lighting set-up as well as a less contrasty lighting setup depending on the and a slight imbalance with deeper tones are its highlights.
You can use backlighting when you don’t need the background to be emphasized, or just a hint of the background elements is all that is required for a photo. You can use backlighting when you need a low-key effect for a portrait or profile shot. You could even shoot landscape photos with backlighting.

Fussgänger by Fussgänger by Sascha Kohlmann
There are scores of other situations when you may use backlighting. Street photography is another example when backlighting can be used. Golden hour is another example that I can think of when backlighting can work. The sun is lower to the horizon. The light is almost parallel. Strong backlighting can sometimes produce less contrasty images.
How Many Lights Do You Need?
To begin experimenting with backlighting you need only one light. One light placed at an acute angle behind the subject and aimed directly towards the subject’s back separating him / her from the background. As explained above, you will know that you have nailed the set-up when you can see a distinct edge, an illuminated outline of the subject defining him /her against an otherwise underexposed background.
Two lights would be my set-up of choice as I want a slightly less contrasty effect. I will also go the distance as to use a broad softbox set-up at an angle behind the camera and firing directly towards the subject. The light itself would be powered down so that it fires at less than full power. Additionally, there will be no grids on the lightbox. A grid will make the light beam narrow, something that I don’t want for my photos with this setup. I might do that in case I need a more contrasting look.
The ratio of lighting would be 1:2 between the key light and the background lights to start off. But that’s just me. It’s my way of shooting. You are free to experiment with this set-up. Use one light or two with or without a softbox. Three lights would be optimum.
The Use of Gels in Backlighting Set-ups
A tool that is rarely used these days and Photoshop and other editing tools is to blame for their demise is gel. Gels come in all shapes and colors. My favorite are the orange, yellow and blue gels. You can achieve a lot of cool effects with gels provided you know what you are doing. Wrap them around a speedlight and immediately you change the mood of a photo.
How about an extended golden hour? Use a strobe fired at full power from about the same height as the camera wrapped with an orange CTO gel. Voila! You have yourself an improvised golden hour light. You can shoot with this for an extended amount of time, beyond the normal golden hour.
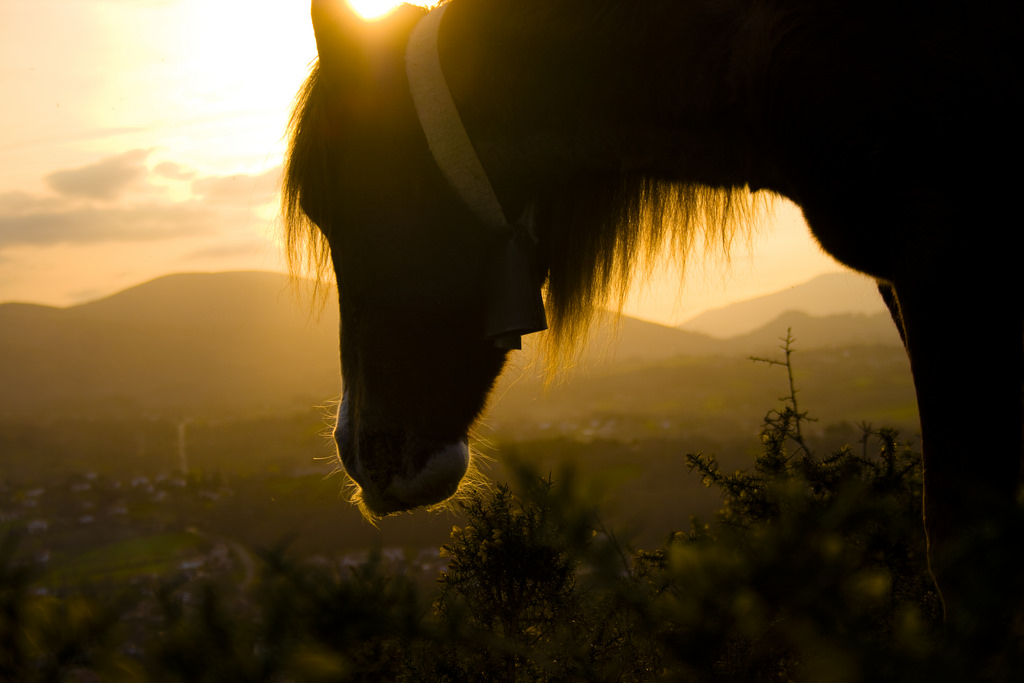
Pottoka by Alejo
With a cool blur gel you can mimic a funky light effect. Use two or three speedlights fired at reduced power from above (but within the frame) in unison gelled with different colors and you can mimic a stage light set-up.

Latest posts by Ben Novoselsky (see all)
- How To Store Photos So They Don’t Get Ruined - April 26, 2018
- Tricks for Mastering Long Exposure Night Photography - November 7, 2017
- Tips to Take Better Photos On Your Phone - October 29, 2017