Occasionally, when you’re working in photography, you’ll come upon an image that would be better on another background. Let’s say, when this happens and you have the perfect replacement background, you find to your disappointment that the new image isn’t the right size, even if you zoom and crop. Does this mean you have to start the search over again, spending time going through stock photo sites, or taking more images? Not necessarily. For instance, I needed a background image that was quite perfect for another tutorial, and I was not happy to have to give it up; so I didn’t. Instead of looking for an image to fit my needs, I just made it work! How?
If you have all your images all picked out, you’ve already done the hard part! The two images I’m working with today are an image of a stream with a tree covered hill and an image of the sky

For the tutorial I’m writing, I need more sky area over the hill, so I need to add it. There isn’t enough area of existing sky to work with the Content Aware tools, which would be a possibility if there were just a bit more sky, so I need to work with what I have.

The first thing you want to do is increase the usable area on the main background image, at the top, using the crop tool. Double click on the locked background layer in the layers panel to unlock it, and then select the crop tool from the tool panel, dragging up at the top. Since you unlocked the background layer, it’s transparent. If you get to this point and the added area is white or black, you’ll know the background layer is still locked.

Next, move the image of the new sky to the background image by having it open on your desktop and moving it into the background image; resize and move to the top as needs be. Now, add a mask to the sky image layer.

With black as the foreground color, select the Gradient Tool in the tool panel and then select Black to Transparent. Drag the gradient tool on the layer mask, like this example:

This blends the existing background with the new sky. If you’ll notice, below, the sky now seems to blend in with the existing sky, it looks completely natural.

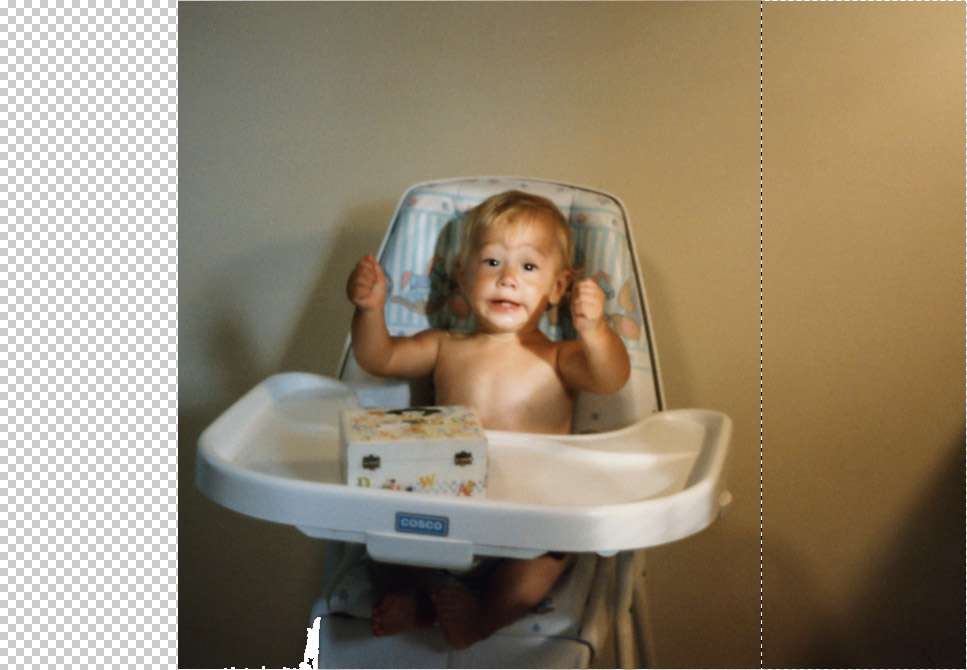
True, there are other ways to accomplish this, but it’s by far the quickest! But will it always work? Of course not! As many things that Photoshop can do, and it can do a lot, and as many tutorials there are out there for any given technique, there is none, not one, which will work 100% of the time. It’s like foundation makeup; if you put one color on every skin tone, you’d have some major funkiness walking around! Therefore, it’s important to learn than one technique to do anything. For instance, if you have an image that has a lot of blank space in one area, you might be able to “steal” some to make another area larger. Let’s look at this photo of this little guy. You can see the picture is very much off center, and maybe your client wants it centered. You could take the easy way out and crop the other side in to make it more uniform, but then you may get into a problem if the client would like to frame it. You can add white space, true, but this option looks so much more professional.

Start as you did the other image, by double clicking on the background layer to unlock it. I’ll say, here, that I would now use the Ctrl or Cmd + J keyboard shortcut to duplicate the layer. I do this for a specific reason. While, yes, I like to work non-destructively and also like a pristine copy just in case I have to start over, or something horrible like that, but I really do it for the “before and after” element. It helps me to have the before and after image in the same layer stack so I can quickly turn off the top layer and see the before copy and can tell if there are things I may have missed or things that just don’t look right. This is more important on restorations, but can be helpful in retouching, also.

Once the background layer is unlocked, grab the Crop tool and pull out the left hand (or whichever side you want to enlarge) side.

Now I’m going to borrow some real estate from the other side. Please note that I ended up using a larger area than this screen shot shows; I went a little into the high chair, know II could go back and erase parts of it later if it was still showing. So, grab the Rectangular Selection tool and select an area from the left.
Now go to Image > Transform > Horizontal Transform to flip it, well, horizontally!

And move the borrowed layer over to the right side.

My screen grabs have finally caught up to the new section I chose. My goodness, but I’m lazy!

Now repeat the process of using the Gradient to blend the new area in with the existing. With black as the foreground color, select the Gradient Tool in the tool panel and then select Black to Transparent. Drag the gradient tool on the layer mask.

If the area you’ve borrowed is limited in usable area, you could end up with a band of transparent pixels in between the new and old areas.

If it happens, it’s a super easy fix. With the new area layer selected, use the Ctrl or Cmd +T to bring up the Transform tool. Simply pull the right side edge out into the existing image, just until the transparent pixels are blended in. Fixed!

We’re almost done, here, but I want to take one second and address the color shifts in the background. You see it changes to a blue tone in the shadow and then, with the new area, it’s beige again, so it looks like a beige / blue / beige zebra. To fix the tones, simply sample the beige color, say on the right edge of the image, make a new blank layer, and change the Layer Blend Mode to Color and paint over the blue area. When you’re done and all the blue has been changed to beige, go up to Filter > Blur > Gaussian Blur and move the slider up until the newly painted area blends into the existing beige color. That’s the “Layer 3” area in the image, below. I went over it again with the same color and the Blend Mode changed to Darker Color (Layer 4). If the first attempt isn’t what you’d like it to be, make another attempt with a different Blend Mode. Sometimes another one works out better and sometimes two or three different ones do the trick.

Now it’s all just clean up! With the new area still on it’s own layer, add a layer mask. With the foreground color set to black (and the mask is still white), carefully go over any area that needs to be erased, in this case the corner of the high chair that was obscured by the new background, just on the corner. You may not have to even do this step, but it’s a good idea to just check for any unwanted areas that may show up.

Now you assess the work. Is it what the client asked for? Is there anything that looks off? In this case, yes, there is. I don’t like the symmetry of the shadow that was on the lower right and is now also in the lower left. Another easy fix, simply select the area with a selection tool (I used the Patch tool to get more of a freeform selection) . Once the area is selected, either go to Edit > Fill > Content Aware, or Shift + 5 to bring up the Fill Panel.

And that’s it! You now have a frame ready photo that is so much more professional than a quick crop!


Janine Smith
Latest posts by Janine Smith (see all)
- Double Exposure Effect in Photoshop - May 17, 2016
- Extending a Background with Photoshop - May 12, 2016